Create a new Entity:
In this section of the article, we will go through the steps that are needed to create an Entity.
Step 1: Log in to your Microsoft Dynamics 365 account.
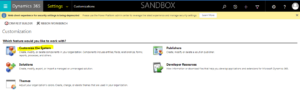
Click on the Menu button and then select the “Settings” option as displayed in the below screenshot.
Step 2: Now, click on the “Customize the system” option.
By clicking on the option, it will open up a default solution window.
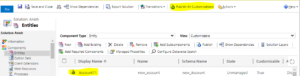
Step 3: Now, click on “Entities” and this will open more options from the left panel.
Step 4: Now click on the “New Entity” option.
Step 5: Within the entity form, please enter the information like :
a. Display name
b. Plural Name
Also, under “Areas that display this entity”, please select the options, Sales, Service, Marketing.
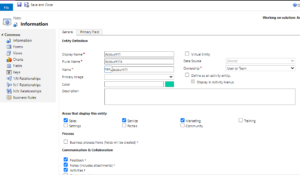
Step 6: After selecting the necessary information, now click on Save and close icon.
Following this process will create a new entity in the CRM database.
Step 7: The newly created entity will be displayed in the default solution parent window.
Creating Records:
In this section of the article, we will go through the process of creating/ update/ open/read/delete a record. Within a CRM system, it is all about managing previous data within the system.
Step 1: To create a record, it needs an entity, to begin with. So, as per the above process, you have already created an Entity called Account11s by this time. So let’s create a record for the same entity.
Navigate to Account11s entity
Step 2: Click on the New icon
Provide valid information and click on the “Save and Close” button.

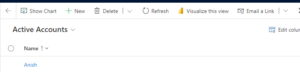
Step 3: By completing the above step, an active record is created within the entity called “Account11s”.
See the screenshot below:
Accessing Records:
In order to access the existing records, please go to the entity page.
In this particular case, go to Show work areas> Sales> Extensions> Account11s.
All the records that were created in the “Account11s” entity will be displayed here.
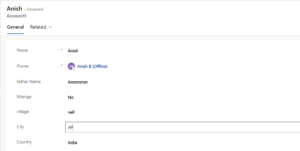
Click on any specific record to view the information.
Updating Records:
Follow the above process “Accessing Records”.
Click on any particular record to view the information. In this page, you can modify the data accordingly. By default, all the information will be saved automatically, and this is because of the “AutoSave” feature that Microsoft Dynamics 365 has in place.
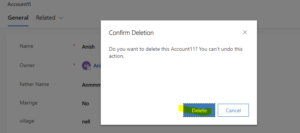
Deleting Records:
For you to delete the records, please go to the specific entity where you want to delete the information.
Step 1: Now, select all the records that you want to delete from the entity.
Confirm the deletion of records by clicking on the “Delete” option
Adding Fields on Form:
In this section of the article, we will go through the process of adding new fields to a form:
Step 1:Make sure you are logged into Microsoft Dynamics 365.
Now click on the top ribbon button, it will open up a few options.
Within the available options, click on “Settings”.
Step 2: Now click on the “customize the system” option.
This will open up the default window option.
Step 3: From the left panel, select the “Entities” option.
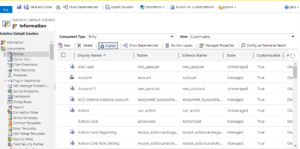
Step 4: From the list of available entities, please select the “Account11” entity that we have created above (I.e. create a new entity section).
Clicking on the Account11 entity will show you all the sub-options that are available. ( you can see Forms, View, Charts, Fields, etc)
Step 5: Click on “Fields”. It will open up a grid where you can see all the fields that can be used. All of these fields are available by default. The user will have an option to create new fields as per the requirement.
Step 6: Click on the “New” button.
A new window will appear. In this window, please enter the following details:
Display Name: Employer Type
Name: This field will be auto-populated based on the display name.
Data Type: Select Option set from the drop-down.
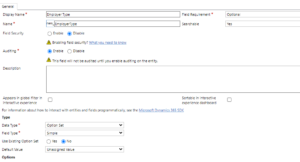
Step7: Click on the “Save and Close” button. This action will create a new Employer type field within the form.
Step 8: Add a few more fields that you have done in Step 7.
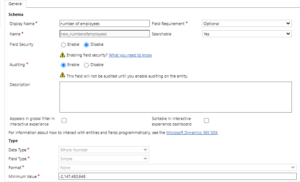
The number of employees: This will be a whole number field.
Founded on: This will be a date and time field.
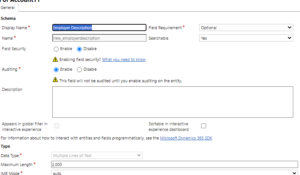
Employer Description: This will be multiple lines of the text field
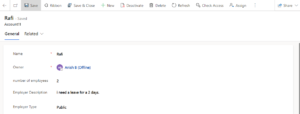
The below screenshots display the data after adding the three fields.
The below Screenshot is for the “Number of employees” field:
Screenshot for the Employer Description field
Step 9: So far, we have created different fields.
Now, let’s add these fields to the Account11 form.
To do this, click on “Forms” from the left navigation under the “Account11” entity.
For every form, Microsoft Dynamics creates two versions of it. I.e. Main and Mobile Express
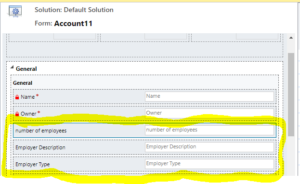
Step 10: The newly added fields can be seen in the below screenshot.
The fields are available within the Field Explorer panel, which is available on the right of the screen
Step 12: Click on “Save” and then click on “ Publish”
All the fields that we have added in the form can be displayed below in the screenshot.
We have started a new online retail store ![]() Please Visit.
Please Visit.